
Materials Needed for Creating a Beaded Christmas Tree
- Around eight feet of stiff beading wire – the gauge will depend on the size of your beads.
- Green glass beads – you can choose any size or shape, just make sure you have enough to cover the length of your wire.
- A variety of colored beads – think red, clear, gold, white, silver, and so on. These will serve as your decorations.
- Two sets of beading pliers
- A pair of wire cutters
Elementary Instructions for a Beaded Christmas Tree
To create your beaded Christmas tree, begin with a single green bead on the wire, using pliers to loop the wire back around it. This serves as the top of your tree. Next, twist the wire into a tight spiral, placing the bead at its center. As you progress, allow each successive wire ring to be a tad looser until you’ve utilized the entire length.
Now, start adding beads to the wire, starting from the outer spiral and nudging them towards the center. Predominantly use green beads, however, feel free to sprinkle in other colors and sizes for a festive touch.
Once the spiral is fully adorned with beads, use your pliers to secure the end, ensuring all beads stay put. Now, gently tug on the central bead, morphing the spiral into a cone or tree silhouette. Feel free to fine-tune the shape to your liking.
If you plan to hang the beaded tree on your actual Christmas tree, attach a ribbon or string to the top bead. For standalone trees, double-check that the bottom is flat and sturdy.
Read more: Christmas trees cyber Monday

Gather your materials and a stepping stool
You’ll need to gather your materials first. For every vertical foot of the tree, you’ll need two strands of beaded strings. Also, keep a step stool handy next to the tree – it makes reaching the top a breeze and ensures you’re safe while doing so. It’s always a good idea to have an extra pair of hands to help you hang the beaded strings, so see if someone can lend a hand.
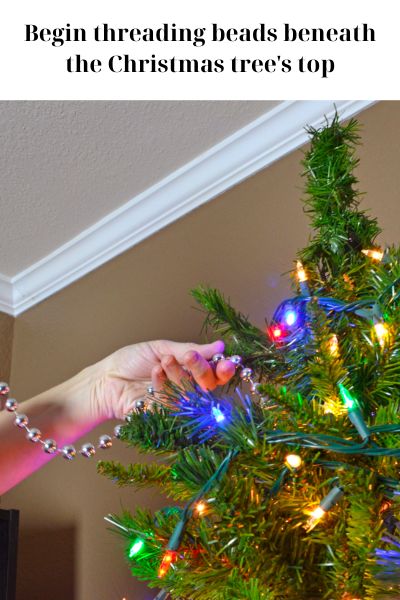
Begin threading beads beneath the Christmas tree’s top
Start by positioning one end of the bead string at the top middle section of the tree, roughly 4 inches below the peak. Fasten this end by winding it around a branch a couple of times, ensuring it’s tucked away and not visible from outside the tree.
Hang the beaded festoon around the Yuletide tree
Start wrapping the beaded garland around the holiday tree in a loose spiral motion, going down and around. Aim to have each spiral about 8 inches apart, especially on the top third of the tree. This spacing will allow the beads to dangle freely and add a touch of festive sparkle to the tree.
Read more: How to water your Christmas tree?
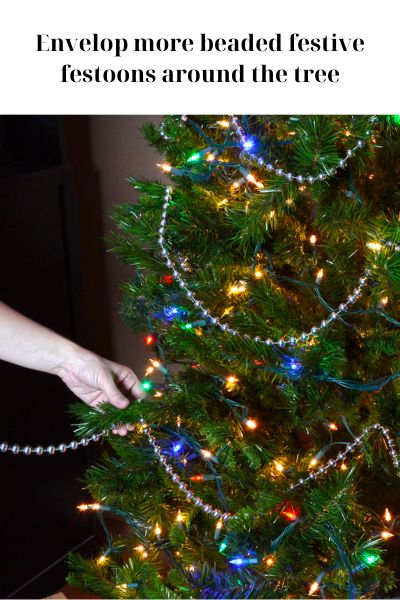
Envelop more beaded festive festoons around the tree
Continue the process by adding more beaded holiday garlands around the tree, letting them drape between the tree branches for a visually appealing effect. Instead of a straight spiral pattern, this creates a more dynamic look. As I move past the top third of the tree, I’ll bring the spiral loops closer together, reducing the spacing to about 6 inches apart. This change in spacing adds depth and interest to the tree’s overall appearance.
Fasten the terminal of the bead Yuletide tree festoon
To finish off, I’ll tuck the end of the bead garland into the center bottom of the Christmas tree. This will keep it hidden from view, maintaining the illusion of a continuous cascade of beads spiraling down the tree.
Add the final embellishments to the Christmas tree
Once the beads are hung, I’ll step back and give the tree a good look, making any necessary tweaks to the bead drapes. The beads can be the star of the show or I can mix them with other Christmas decor like ornaments, pine cones, or tinsel for a more festive feel. Remembering to add a tree skirt and a topper if they’re not up yet.
Whether it’s a rustic wood bead garland or a glamorous shiny bead string, careful placement can make all the difference. Starting from the top and working my way down, I’ll make sure to occasionally take a step back to check and adjust as needed. Tucking the end of the beads at the bottom ensures a seamless look. Once that’s done, I can add the rest of the ornaments, putting the final touches on our family’s perfect Christmas tree.

Advice for Novices in Beading
If you’re a beginner in the beading world, here are some handy tips to help you enjoy this activity and similar ones:
Patience is key; don’t fret if things seem slow at the beginning.
To avoid beads rolling off your work area, use a cookie sheet or a tray with sides.
It’s worth getting the right beading tools like pliers, they make working with wire much easier.
If everything seems too much, start small. You could begin with something as simple as a mini Christmas tree and gradually take on bigger projects.
Intriguing Variations of Beaded Trees
Some exciting twists on the traditional beaded Christmas tree could include:
- Experimenting with beads of various shapes, such as faceted or star-shaped ones.
- Shaking things up by swapping out glass beads for wood or metal alternatives.
- Vintage beads repurposed from old jewelry can lend a unique touch.
- Playing around with different colors could result in a stunning white or gold tree.
- If you’re feeling ambitious, you could attempt a more complex design using seed beads and wire loops in a technique known as French beading.
Enhance Your Festive Season With DIY Decorations
Adding a personal touch to the holidays can be as simple as crafting your own decorations. Whether it’s a beaded Christmas tree or bespoke ornaments for your actual tree, the festive season is the perfect time to let my creativity run wild. DIY decorations not only personalize my space, but they also make thoughtful presents for family and friends. By immersing myself in the fun of crafting, I can make this holiday season truly unforgettable.

Hi, I’m Eugene B. Conley – the CEO of cybermondaychristmastree.com. I was born on December 13, 2000, and I’m a proud Sagittarius. I currently live at 3524 Reeves Street in Green Bay, WI 54301.
Before becoming the CEO of cybermondaychristmastree, I worked as a Meter Reader at The Pink Pig Tavern. While I enjoyed my time there, I had a passion for e-commerce and technology. I decided to pursue my dreams and started my own online venture.
At cybermondaychristmastree, we offer the best deals on Christmas trees during the Black Friday season, from Amazon to Walmart and many more. We help customers find the perfect tree for their homes at the most affordable prices, while also making their holiday shopping experience seamless.
Thank you for taking the time to read about me and my journey at Cyber Monday. I am committed to providing excellent service and quality products to all our customers.